To make a long story short, it’s not trivial to access the content of the Mensacard and I didn’t managed to do it with the technology I had at hand.
But if you ever wanted to develop code for your Arduino in Emacs instead of the Arduino IDE, you will find a more or less comprehensive guide to do so in here.
The technology I used:
- Acer Aspire S3 running Ubuntu 16.10
- Arduino Mega 2560
- Elechouse NFC Module V3 shield
- Huawei ALE-L21
RFID and NFC
But let’s start with some basics. What exactly is RFID and NFC?
Radio Frequency Identification (RFID) is a way to establish a wireless communication between an active sender and an active or passive receiver along very short distances (several centimeters). As far as I understood, there is no true consensus about how this communication is established or which kind of technology is used. In addition only small amounts of data (<1kB) can be transmitted.
This is where Near Field Communication (NFC) enters. It’s a subset of RFID and provides a standardized protocol, the NFC Data Exchange Format (NDEF), to transmit messages between devices. This can be either used to store/access information on cards (up to MBs) or to establish a direct communication between devices.
I won’t go into detail here because in the end I unfortunately can not apply this knowledge on a practical example. But if you are more interested in the topic of NFC, be sure to check out the book of Tom Igoe. I again enjoyed it quite a lot.
Android
So, I tweaked the app until I point I was finally able to read the content of RFID based cards (Latest version in the git repository). But unfortunately my phone was not capable of accessing the content of neither the Mensacard, nor the NFC tag I bought alongside the NFC Arduino shield. I just can read the Unique Identifier Number (UID) of both. You can think of this to be just the card’s name. It was not just my phone. In fact I tried three different ones and each of them provided just the UID. So in the end the mobile phones are probably just intended to use NFC for communicating with other devices instead of interacting with cards.
But reading the card’s name is already something. Imagine: You could be spied on by people, who just read out your cards UID whenever they pass by you or whenever you pass a certain checkpoint. Could this be possible with an Android phone?
Detecting NFC cards using Android
Yes. It’s indeed quite easy.
The Android operation system handles a lot of things quite differently than your normal computer. When you turn on your phone’s NFC and a corresponding card is in its vicinity, a so called event is raised. The smartphone is more or less shouting: “There is a NFC card over here. Who knows how to handle it?“. When your NFC reader is already opened and listening, it alone will receive the information and can process it. On the other hand, it is also possible to tell the event listener to start up your app and to perform an action whenever there is a card passing by. In this sense, someone could write an app to collect card identities (even without accessing its content) at certain positions and times, without running out of battery after half an hour.
But don’t panic. The Android phone is just able to read the UID up to a distance of two centimeters through plain air. In a wallet with other cards, even half a centimeter was enough to hide the card from my phone’s eyes. So people can’t spy on you by just activating the NFC capability of the phone in their pockets.
In addition the German ID is encrypted with the so called Password Authenticated Connection Establishment (PACE) protocol. This one just provides a random number instead of a UID and is protected by an asymmetric encryption. Only with an additional password entered via a numpad, the card’s UID and content can be accessed.
Arduino
Alright. Since I was not able to access the content of the card via my mobile phone, I will use an Arduino shield instead.
But what’s even better than handling a micro controller to read the Mensacard’s information? That’s right: doing it using Emacs :)
Emacs as Arduino IDE
First of all, you have to install the android-mk package in order to generate a Makefile to transcompile the written code for the Arduino’s CPU.
sudo apt install arduino-core arduino-mkTranscompiling?
When you computer is compiling code, it translates it into a set of CPU instructions. Those instructions represent your program and are performed whenever you call it. But every family of CPUs has a different instruction set and thus speaks a different language. In order for your computer to be able to compile a piece of code in such a way the Arduino can understand it, it has know the language of the Arduino’s CPU. This whole procedure of translating code into instructions for another CPU to understand is called transcompiling and is guided by the Makefile generated using the arduino-mk package.
Enabling serial communication
Next, we have to add our user to the dialout group to be able to use the serial communication. The later allows use to communicate with the Arduino via USB while it is still running. This way we can both send commands and receive messages. It would be quite pointless for the Arduino to read a card’s information without transmitting it to us, wouldn’t it?
# Make sure to replace USERNAME by your actual user name
sudo usermod -a -G dialout USERNAME
# You need to restart your system to apply this change
Do we need to be in dialout? Actually it would be sufficient to just
run sudo chmod 666 /dev/ttyACM0 every time you connect your
Arduino. But this is quite nagging and you should reduce your sudo
usage as much as possible.
Setting up the Arduino development environment
The most easy way to configure your Arduino board is to just download Arduino’s IDE and run it. Then choose your boards name, the processor and the port in the Tools menu and you are done.
The IDE is storing all the preferences in your home (~/.arduino15/preferences.txt in on my computer) and you can make use of this file from within Emacs.
I am not quite sure if this file is actual used in the compilation procedure. But it’s a good starting point in case some of the settings are messed up and your Arduino is not working smoothly.
Importing libraries
In order to hook you up with to newest versions of the NFC/NDEF libraries, I provide them as submodules. So don’t worry if you don’t see any content in the //arduino/libraries/PN532 folder of the git repository yet. We still have to get their content by initializing and updating those submodules.
# Make sure you are at the root of mensacard-hack's repository tree
git submodule update --init --recursive --remote
Now, every time you would import a library via Arduino’s IDE, it would just copy the folder/unzip the zip to Arduino’s default library path. This one is defined in the preferences.txt file as sketchbook.path. I changed the default ~/Arduino to ~/software/arduino to avoid having countless folders in my home. But this is just a matter of taste. In the end you just add a line specifying ARDUINO_LIB_PATH to the Makefile and you are done.
To install the libraries, you just have to copy all the folders from //arduino/libraries/PN532 into sketchbook.path/libraries. (All the README.md, git related files etc. are not harmful and we don’t have to care about them)
# make sure your Arduino folder really is called ~/.arduino15
cp arduino/libraries/PN532/* $(cat ~/.arduino15/preferences.txt | awk 'BEGIN {FS="="} /sketchbook.path/{print $2"/libraries"}')
The second command is just a small bash script using AWK to extract the default directory from the preferences.txt file. Both bash and AWK are pretty handy for especially this kind of little tasks. They are easy to learn, since both of them are not that complex and have a fairly limited scope of application, and enable you to harness the true power of a Linux system. Be sure to check them out one day! (And don’t forget about sed while your at it).
Installing Arduino-mode
What would be writing code for an Arduino without its distinct mode?
Firstly, let’s download the corresponding Lisp file. (For the sake of completeness, I also added this file to //arduino/res/arduino-mode.el).
mkdir --parents ~/git/emacs-spass
cd ~/git/emacs-spass
git clone git://github.com/bookest/arduino-mode.git
Now we have to tell Emacs where to find this file, to load it whenever we are in need of the Arduino-mode, and which file suffixes are associated with this mode (.ino and .pbe). I actually took a look into the Lisp code and the package adds a hook for those suffixes itself. But it’s good practice to do so anyway. Therefore, we will add the following lines to our ~/.emacs.
(add-to-list 'load-path "~/git/emacs-spass/arduino-mode")
(setq auto-mode-alist (cons '("\\.\\(pde\\|ino\\)$" . arduino-mode) auto-mode-alist))
(autoload 'arduino-mode "arduino-mode" nil t)
Getting started
Now that everything is set up, let’s just start right away.
We create a short script to make the Arduino’s on board LED blinking and to report this via the serial port. Note that we will do so in a distinct folder. Since we have to use a separate Makefile for every Arduino script, it’s good practice to keep them all separated in different folders.
mkdir blinking
cd blinking
touch blinking.ino
touch Makefile
The blinking.ino script will contain the following lines of code.
// Number of the LED's pin
const int led = 13;

// Run once on initialization
void setup(){
  // Setup the serial communication
  Serial.begin( 9600 );
  // Use LED as output
  pinMode( led, OUTPUT );
}

// Run until resetting or switching of the power supply
void loop(){
  // Turn on the LED
  digitalWrite( led, HIGH );
  // Wait a second
  delay( 1000 );
  // Turn the LED off again
  digitalWrite( led, LOW );
  // Wait another second
  delay( 1000 );
  // Print a message via the serial port
  Serial.println( "Hello world!" );
}
Create a Makefile
In order to compile the blinking.ino script, we still have to have a Makefile containing all our configuration. Fortunately we already dealt with the configuration in an earlier step. The only thing left to do is to tell compiler where to find arduino-mk package and which Arduino board we are using.
Therefore the minimal version of our Makefile consists of two lines. (Make sure it resides in the same folder as the blinking.ino script.)
BOARD_TAG = mega2560
include /usr/share/arduino/Arduino.mk
The arduino-mk package will now just reference to the a copy of the preferences.txt file to obtain all additional configuration necessary for compilation.
Compile and upload the code
The most important command to use in Arduino-mode is certainly the one compiling the code and uploading the result to the Arduino. This is done in one single step
M-x compile RET make -k upload
Immediately afterwards your Arduino should start blinking.
Connect to the serial port
Now that our script is running and the LED is blinking, we also want to see what the Arduino tries telling us. For this, just open a new instance of your multi-term in a separate buffer and enter the following commands.
stty /dev/ttyACM0 9600
stty /dev/ttyACM0 raw
cat < /dev/ttyACM0
This terminal will keep listening to the serial port connected to the Arduino and display everything it has to say. (Note, the digit behind /dev/ttyACM can differ)
Using the NFC shield
Next, I connected my Elechouse NFC Module V3 shield to my Arduino Mega
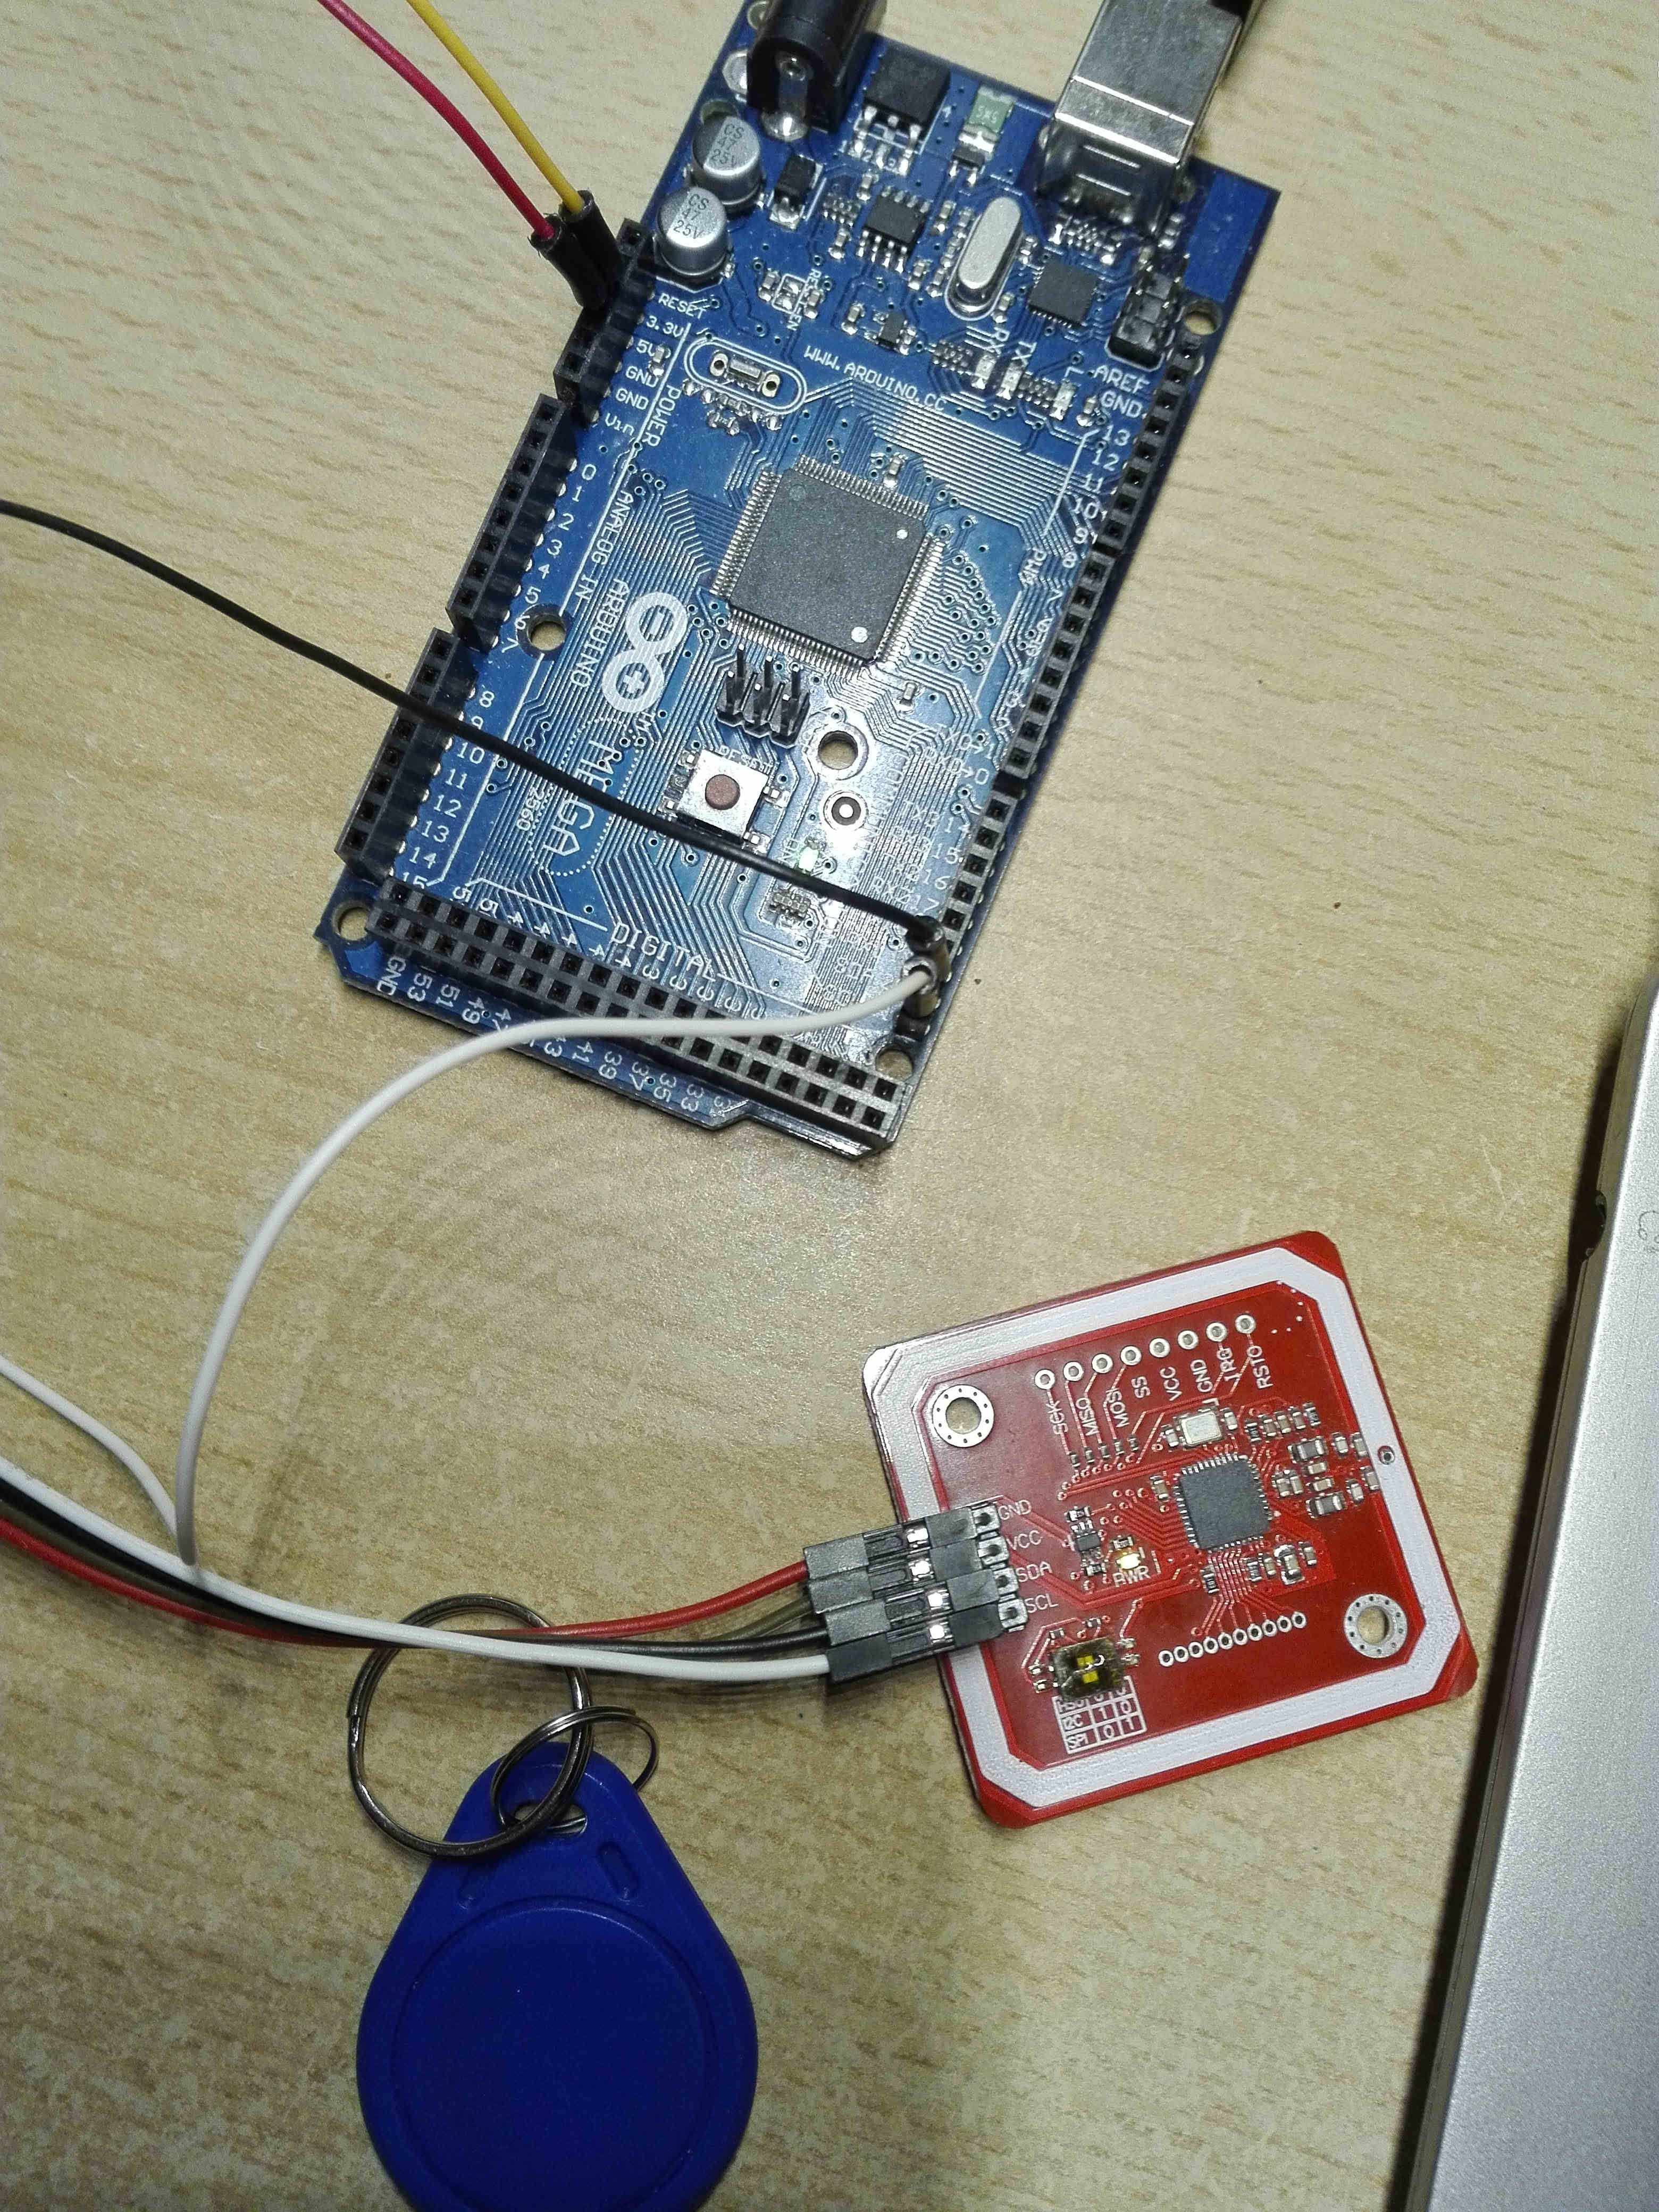
and wrote a little script to detect a NFC tag.
// Use the Serial-Peripheral Interfaces to communicate with the Arduino
#if 0
  #include <SPI.h>
  #include <PN532_SPI.h>
  #include <PN532.h>
  #include <NfcAdapter.h>

  PN532_SPI pn532spi( SPI, 10 );
  NfcAdapter nfc = NfcAdapter( pn532spi );
#elif 0 // If SPI is not working, set this one to 1 to use HSU
  #include <PN532_HSU.h>
  #include <PN532.h>
  #include <NfcAdapter.h>

  PN532_HSU pn532hsu( Serial1 );
  NfcAdapter nfc = NfcAdapter( pn532hsu );
#else // This one I used with my NFC shield
  #include <PN532_I2C.h>
  #include <PN532.h>
  #include <NfcAdapter.h>
  #include <Wire.h>

  PN532_I2C pn532i2c( Wire );
  NfcAdapter nfc = NfcAdapter( pn532i2c );
#endif

// Run once on initialization
void setup() {
  Serial.begin( 9600 );
  Serial.println("Starting up NDEF reader...");
  nfc.begin();
}

// Run until resetting or switching of the power supply
void loop(){
  if ( nfc.tagPresent() ){
    // A tag was detected
    NfcTag tag = nfc.read();
    Serial.println( "Found a tag!" );
    // Print the type of the tag
    Serial.println( tag.getTagType() );
    // And its Unifersal identifier (its name)
    Serial.print( "UID: " );
    Serial.println( tag.getUidString() );
  }
}
In order to establish a serial connection to the shield, I had to use the I2C protocol and switch a tiny switch on the shield. In addition you have to declare all libraries in the Makefile you are about to use in your script!
For communicating via I2C, I had to add the following line.
ARDUINO_LIBS = NDEF PN532 PN532_I2C WireReading the Mensacard and the tag
Now our big moment has finally come and we are ready to read the content of the Mensacard!
But when I tried it: nothing… :| But the tag is working just fine. :|
Shit.
So it’s not that trivial after all to access the content of NFC cards. It’s quite discontent, but I there are a whole bunch of other things in my pipeline. So I won’t buy different hardware to access the card’s information. But I will keep it. Who knows, maybe one day I have a phone/shield capable of reading it.
Summary
Okay, with this I will end my endeavor of accessing the content of the Mensacard. I really enjoyed playing around with JavaScript and Apache Cordova and I finally managed to use my Arduino again. It was quite a lot of fun and I feel more comfortable carrying my Mensacard in my wallet without any protection. I hope you enjoyed it too.
So be skeptical of new trends in technology surveillance, use condoms, and never stop exploring new technologies.