During the past 10 years of making music, recording both mine and other people’s bands, and talking with countless musicians I picked up a lot of different facts and hints concerning music production. But it was basically just a collection of a lot of details, which did not made me see the bigger picture. So what was the purpose of mastering again? Is the DAW, which I use for recording my songs, sufficient for the mixing procedure? What software can I do the mastering in? And do I actually need it?
To answer these and many other questions and to be finally able to craft not just the music but also the sound I have in mind, I read some books about recording, mixing, and mastering.
What I will report is of course just a very superficial summary of those topics and the techniques are just briefly mentioned without a detailed explanation. If you want to learn more about all the things mentioned in this post, I would recommend to read some very nice books I came across.
- Sound studio by Alec Nisbett is a nice and well written book about the very basics of recording and music production. What is sound? How it is produced and how does it travel through air? It explains the capturing of sound in a lot of detail, discusses the different kinds of microphones, their benefits and shortcomings, and how to improve the sound in your living or rehearsal room with just a few steps. Therefore, it is an excellent book on the recording of audio. But it does not stop there. It also explains the basics of dynamics, equalization, and reverberation. Although it covers some parts of the mixing and mastering step, I would definitely recommend reading some additional books entirely focusing on these topics.
- Mixing audio by Roey Izhaki and Practical Mastering by Mark Cousins and Russ Hepworth-Sawyer are both comprehensive books on mixing and mastering respectively. While they are packed with detailed information including various parameter settings and practical examples, they do not miss to provide basic introductions and to pick up readers, who have not looked into the particular fields at all.
Recording
The overall goal of the recording step is probably the one most straight forward and easily to comprehend. We want to capture the sound of one or several instruments in a studio or rehearsal room in a digital format. Using the recorded audio files, we can assemble the final product, e.g. an album, soundtrack etc, later on.
The most important point you have to keep in mind is that you should make an effort to capture exactly the sound you want your instrument to have later on. There are a lot of tricks one can play during the mixing and mastering step, but none of them involves magic. Even the best sound engineers won’t make your music sound awesome if your recording was performed very poorly. You should use the best microphones you have access to. They should not color the sound and capture the whole frequency range of the instrument. If you capture just the bass and mid ones, there is no way of regaining the high end of the spectrum.
In order to have the least amount of noise and contribution of other instruments, it is a good idea to record the instruments one after each other. Typically, one would start with the drums and use its audio as a playback for the other instruments. This could, however, cause some loss of energy in music, which is mainly supposed to be played live. Here, you should only record the drums and one guitar in the first steps with a careful arrangement of the microphones to reduce the intake between the instruments. Vocals should always be recorded separately.
When a room is used for the recording, which is quite big, you could have some nasty reverberation in your audio. This is almost never a good thing to have. In such a case you are better off placing a lot of objects in your room and on the wall, like curtains, flags, shelves, or pictures, to break down the reflections and to absorb part of their energy. You can always add some artificial reverberation (AR) in the mixing step.
Toy with the placement of the microphones. Sometimes a couple of centimeters off the axis of the speaker of your guitar amp does the trick and the angle might be crucial for the perfect sound of your snare drum. Let the recording run, produce some sounds, adjust the mic position and report it to the microphone, produce some sounds, and so on. Afterwards you can pick the best placement corresponding to the best-sounding take. As I mentioned beforehand, a good recording quality is key to an awesome sound. Also do mind the proximity effect, which gives you too much power in the lower end of the spectrum, by placing the mic at least 10-15cm away from the source of the sound.
Tools
- Microphones
- Audio interfaces
Hints
- Use good microphones and audio interfaces
- Record instruments separately (or at least with different microphones)
- When recording with multiple microphones, place them in such a way the overlap of their fields of recorded sound is as small as possible
- Match the frequency responses of the microphones with the frequencies produced by sound source
- Place the microphones at least 10-15cm away from the sound source (if possible) to prevent the proximity effect
- Shape your sound prior to the recording (adjust the sound of your guitar using the knobs on your amp over doing it via plugins during the mixing step)
- Keep in mind: each instrument might have its own best sound but at the end of the day it’s the sound of the whole ensemble that matters (When using two guitars adjust their frequencies so they are complementary. Cut one guitar at high and boost it at mid frequencies and do it the other way around for the second one. Cut the lower part of the spectrum to keep enough room for the bass guitar)
- Record the instruments one after each other or use a metronome to align them in time
- For guitar and bass amps: let the sound travel through air instead of using the lineout
- Record your guitar tracks twice and place both them both in the mix for a more powerful guitar sound (if you have just one guitar in your ensemble try to use two different sound settings)
Mixing
In the mixing step we take all the recorded audio files and combine them together into one single (stereo) signal. During this process we want all the individual instruments to keep their characteristic sounds but also to blend them in such a way they get along with each other smoothly. Also, the overall character and attitude of the music should be maintained and possibly intensified.
A core concept we will use to produce a defined and at the same time powerful sound is the spectrum of our audio files. Since we used good microphones to record the individual instruments, most of them cover a broad range of frequencies. But as soon as there is more than one instrument in a certain frequency band, our ears have problems in distinguishing between them. This leads to a dull sound. On the other hand, if our instruments didn’t covered the whole frequency range the human ears are sensible in, the signal will sound weak and boring. So our goal is to align the different instruments in the spectrum in such a way each of them gets its own range it has the most power in and the gaps between those ranges become minimal.
This task is performed by equalizers. But it’s not the only one. We will also use equalizers to remove artifacts introduced in the recording step. There are three main types. Low-pass and high-pass filters are used to both cope with the proximity effect introduced by the placement of the microphone and to remove the power from the lower or higher end of the frequency spectrum so e.g. the bass guitar does not enter the range of the bass drum or the guitars do not enter the range of the bass guitar. Shelving filter boost or cut all frequencies below or above a certain crossover frequency in a uniform way. They can be used for example used to place two similar guitar sounds in different neighbouring frequency ranges. Finally, the are parametric or graphical equalizers, which give the user a fine tuned control over the frequencies of a signal. They can be used to enhance the sound of an instrument, like boosting the higher harmonics of a snare at around 1kHz, or to make its sound more dominant in the mix by cutting the same frequency in all other audio signals.
Which frequency to cut or to boost is a central question in the mixing step. An easy way to choose them is to use a parametric equalizer with a very small bandwidth and an unreasonable high gain. Then one gradually increases or reduces its frequency and carefully listens whether to the sound changes for the better or the worse. If you found the right frequency, it’s time to set the gain and bandwidth to their default values and change them gradually until the perfect setting is found. Another way to access the spectrum of an audio signal is by just displaying it and its change due to the effects applied to it. Check my post on spectral analysis for a discussion of different applications for Linux.
The second most important part of the mixing step is to handle the individual volumes and dynamics of the instruments, which is done by a tool called compressor or its extreme version called limiter. It reduces the volume of a signal above a certain threshold by a factor, determined by the ratio of the compressor, while leaving the parts of the signal with lesser volumes untouched. It can be used to tame the variability of the loudness of an instrument.
Apart from these two major tools there is a whole zoo of smaller ones, like gates for noise reduction and reverbs for adding some room coloration. But I can’t be comprehensive in here, so I have to point to the references above instead.
An important note to make is about the good old saying the loader, the better. Well, it is actually true. Our ears perceive the same music played at a louder level as preferable since it is more responsive to the high and low frequencies at those volumes. What seems to be side note is actually one of the biggest pitfalls in the mixing and mastering steps. When applying an equalizer or compressor, which is boosting the signal, you have to be very careful to not let your judgment about the quality of the sound be clouded by the difference in volume. Instead, you should constantly ride the gain to compensate for such differences in volume.
Tools
I am using the program XXX. Can I use it for mixing and/or mastering?
Is your program capable of handling multiple tracks of audio? Can it use plugins providing you equalizers, compressors etc.? This is basically all it needs.
There is also no need at all to invest (money) into audio software handling the recording, mixing, and mastering. You are better of buying decent hardware like microphones, amps, and audio interfaces instead and use open source software to do the job. In a previous post I gave an overview about the software available for Linux. Personally I use the Non suite for recording, mixing, and mastering. But this is a matter of taste and you are free to choose whatever DAW you like.
- Equalizers
- Compressors
- Gates
- Reverbs
- (Distortion & Phaser & Flangers etc. pp. to alter the audio)
Hints
- Every instrument should occupy its own frequency range, where it has more power then the other ones
- The distance between the different frequency ranges should be minimal
- Use low-pass filters to correct the proximity effect and parametric eqs to compensate the frequency response of the mic
- Use parametric eqs to enhance the characteristics of the instruments
- Cut with a small bandwidth and boost with a larger one using parametric eqs
- Use compressors to tame the variations in the loudness of the instruments
- Use a short attack of about 20-30ms in your compressor for the bass drum and bass guitar and longer attacks for the other instruments
- Better cut the silence in the tracks then using gates
- If not possible, use gates to suppress noise
- Add some additional room coloration using reverbs
- Mind the order you apply the effects to your signal. Low-pass & high-pass -> shelf-filter -> parametric eq -> compressor -> reverb -> gain
Mastering
This third and final step is applied on the single (stereo) track produced at the end of the mixing step. The objective is to shape the overall sound and dynamic of a song, make different songs of an album fit together, and to increase the overall loudness of the track(s). While the first step is an optional one, the latter are essential for an album to be perceived not just as a collection of different songs, but as a solid and close piece of art.
The tools we use in this steps have already been introduced in the mixing step. We will use shelf filters to color the signal and make different tracks of an album fit together and use compressors to tighten their dynamic range. But in comparison to the mixing step, we will only add small details. A boost or cut of 0.7dB might be already sufficient. Same holds for the compressor. With a very low threshold and a ratio of 1⁄2 or a rather high one and a ratio of 1⁄4 you can already alter your dynamics in a very nice way. Overdoing effects in this stage of the audio production will usually just spoil the result.
A tool, with which you can combine both the coloration and the reduction of the dynamics, is the so-called multiband compressor. But it should be used with care. Apart from the ‘the louder, the better’ issue discussed in the mixing paragraph you might accidentally alter the color of your sound while you only wanted to compress the dynamics of certain frequency ranges. But why would one do so in the first place? Because the lower end of the frequency spectrum usually holds the most power. By cutting there one can increase the perceive loudness.
The loudness of your track or album is one of the central objectives of the mastering stage. Our ears have some inertia when it comes perceiving the volume of an audio signal. So, having a very load burst in volume, which only lasts for some milliseconds, in front of a track will not make our ears to classify the song as a loud one. Instead, we are more sensitive to the average amplitude of the signal. Therefore, you can frequently find the abbreviation RMS to access the loudness of the signal. It represents the mean value of the root of the squared amplitude of the signal. The mean value is modelling the inertia of our ears and the root and square ensure the measure to be non-negative.
But since there is a maximum value of 0dB for the audio signal, the short burst at the beginning will dominate the overall loudness of the track. Well, we could just raise the volume after all and let only this transient exceed the 0dB limit. What would happen? In the recording of analogue signals this would lead to distortion. But in our digital world it will produce clipping. Everything above this limit will be chopped of and replaced by a straight line at 0dB. This would, however, introduce a harsh noise in the signal clearly audible for everyone. Instead, we will use the so-called limiter, an extreme version of the compressor with its ratio set 1 over infinity (0).
The use of the limiter shouldn’t be overdone. There is the so-called loudness war in which every sound engineer and record company wants to make their products as loud as possible. And of course, by overusing the limiter and removing all dynamics from the signal, we would make it as loud as possible. But the dynamic is an important part of our song and some clipping effects can not be avoided in such a process. Instead, I would recommend to don’t push the loudness of your tracks to the limit and mainly use it on transients.
Apart from the loudness and coloration, the mastering is also the step where you have to think about an appropriate order of your songs. This arrangement, as well as fades and silence between the tracks, are important keys to ensure the flow of your music on an album.
Tools
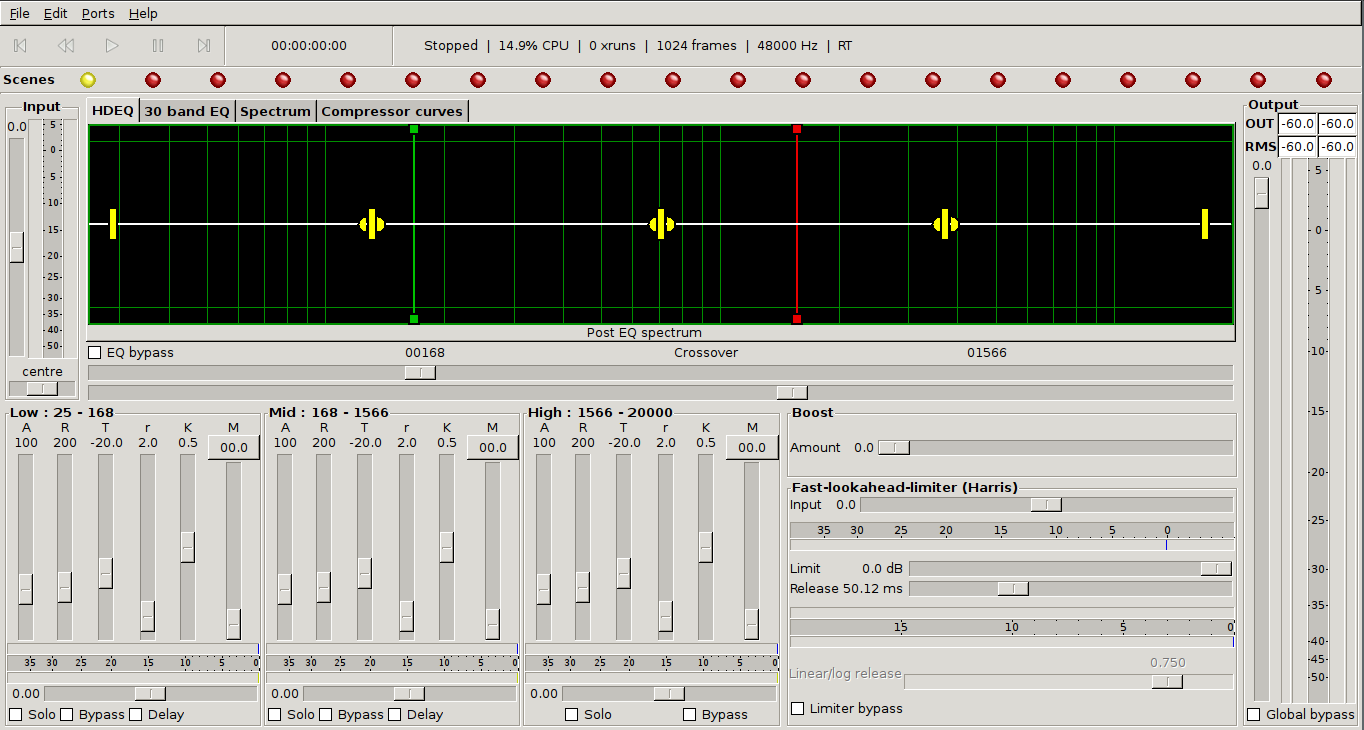
In JAMin you can find a very nice Linux program containing a multiband processor, graphical equalizer, and limiter. Chaining it to the output of your DAW used for mixing will make the mastering step in particular convenient.
- (Shelf) Equalizer
- Compressor
- Limiter
- Fades
Hints
- Slight shelf filters for coloration
- Slight compressors for tightening the dynamics
- Don’t overuse effects at this stage
- Use coloration to make the tracks of an album sound related
- Use a limiter to tame transients
- The perceived loudness can be increased using compressors and limiters
- Fades and silence between the songs for the right ‘flow’